Contractor work involves knowing how to use various tools and equipment, including saws. Every contractor or DIY enthusiast needs to know how to recognize the different types of saws available. Each type of saw is suited for different jobs and applications, and each operates differently. Knowing how and when to use each saw allows you to perform any cutting job. Here are the four main types of saws, how to recognize them, and how to operate them.
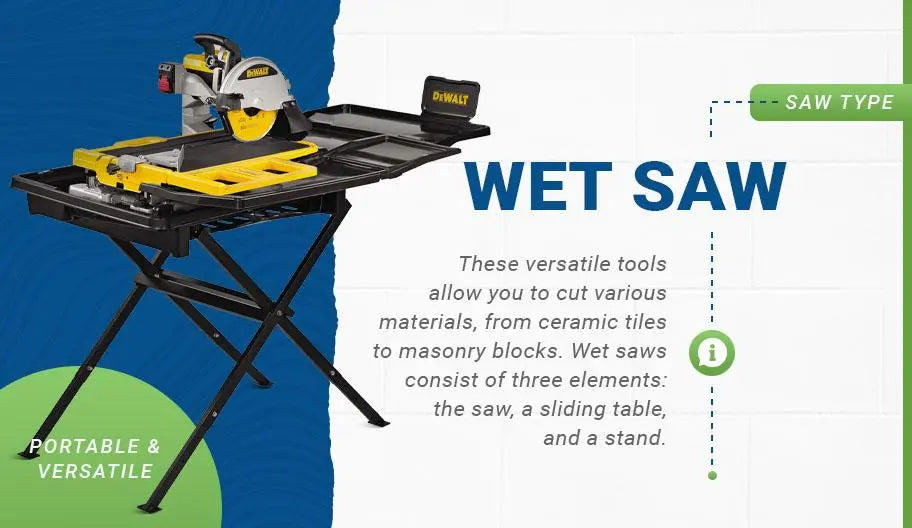
1. Wet Saw
Wet saws are a staple in the contractor’s toolset. These versatile tools allow you to cut various materials, from ceramic tiles to masonry blocks. Wet saws consist of three elements: the saw, a sliding table, and a stand. Although wet saws are typically static and not intended to be portable, some models are mounted on wheels, making it easier to relocate. Other wet saws may feature folding stands for ease of storage.
The term “wet” refers to the saw’s water cooling system, which sprays cold water onto the diamond blade to prevent it from overheating while cutting through materials. A saw that does not use a water-cooling system is called a “dry” saw. Besides keeping the saw blade cool, the water also keeps it lubricated during cutting, preventing the risk of jamming. Jams can damage your saw and break your saw blades, potentially injuring you in the process.
Although the water spraying system partially contributes to dust control (water can absorb dust particles), all saws propel stone or ceramic dust in the air while cutting. Wearing a dust mask is critical to reducing the risk of contracting silicosis, a well-known tiler’s disease.
Wet saws are designed to make precise cuts into tiles and pavers. Although the most common application for a wet saw is to make straight cuts, it is also one of the only tools that lets you make more intricate cuts, such as curves. Although the basic operating principles remain the same, the specific name of the tool may change depending on the type of materials it is mainly intended to cut. Examples of potential tool names you might see include:
- Wet tile saw: Wet saw primarily designed for cutting glass, ceramic, and porcelain tile.
- Wet stone saw: Wet saw capable of cutting tiles made of granite, slate, marble, and other stone materials.
- Wet tile & stone saw: Multipurpose wet saw capable of cutting tile of any material, as long as it is fitted with the correct saw blade.
How to Use a Wet Saw
Although wet saws are among the biggest tools a contractor or dedicated DIYer can possess, they are not challenging to use, as long as you follow the basics.
Before starting, gather the following personal protective equipment:
- Eye protection: Standard plastic safety glasses
- Hearing protection: Earplugs or construction-grade ear muffs
- Protective gloves: Tiler’s gloves or any other type of protective rubber gloves
- Airway protection: Standard dust mask
Once geared up, you can start using your wet saw. Follow these basic steps to make a straight cut:
- Set up the wet saw on a flat, level surface to avoid irregularities during cuts.
- Inspect the blade you intend to use and ensure it has no cracks or deformities. If you find any, replace the blade. If the edges are dull, you can bring it back to duty if you know how to sharpen a saw blade.
- Fill the wet saw’s water reservoir with water. Use clean water only, and fill until the water pump is fully submerged.
- Use a pencil and mark a guiding line on the tile where you want to make your cut. For straight cuts, you can use a ruler. For curved cuts, draw the guiding line freehand.
- Pull the sliding table toward you, and insert your tile. The tile must be sitting flush against the back end. You want to start with some distance between tile and saw to avoid accidents.
- Turn the tile saw on and ensure the water pump is spraying water onto the blade. (If it isn’t, verify that the water pump and delivery are working correctly).
- Align the pencil-drawn guiding line with the saw blade, and carefully push the tile into it until the cut is complete. Work slowly, especially at the edges; rushing may cause the tile to break.
- Once the tile has been cut into two pieces, carefully pull them away from the blade and turn off the saw. Repeat with each new tile until you have completed all your cuts.
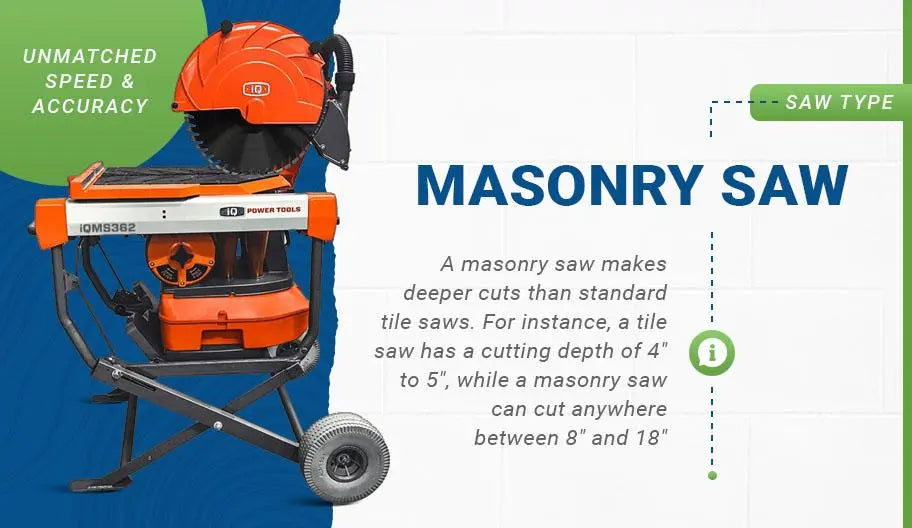
2. Masonry Saw
A masonry saw is similar in principle and overall appearance to tile saws but for cutting construction blocks, such as bricks, concrete blocks, partition blocks, lintel blocks, or pavers.
The primary differences between a wet tile saw and a masonry saw are the cutting depth, the saw blade type, and the cooling system. Bricks and construction blocks are significantly thicker than tile. A masonry saw allows the blade to make deeper cuts than standard tile saws. For instance, a tile saw has a maximum cutting depth of 4" to 5", while a masonry saw can cut anywhere between 8" and 18" depending on the blade size.
Because masonry saws are primarily used for cutting brick and concrete materials, they must use appropriate concrete saw blades. You can differentiate concrete blades from other types by the design of their teeth: They feature large, straight segments, either with or without diamond edges. Masonry saws can be used with or without a water-cooling system, allowing you to perform wet and dry cutting jobs. However, you must select an appropriate saw blade. For example, you should not dry-cut with a wet cutting blade. Like wet saws, masonry saws may have different names depending on the medium they are designed to cut:
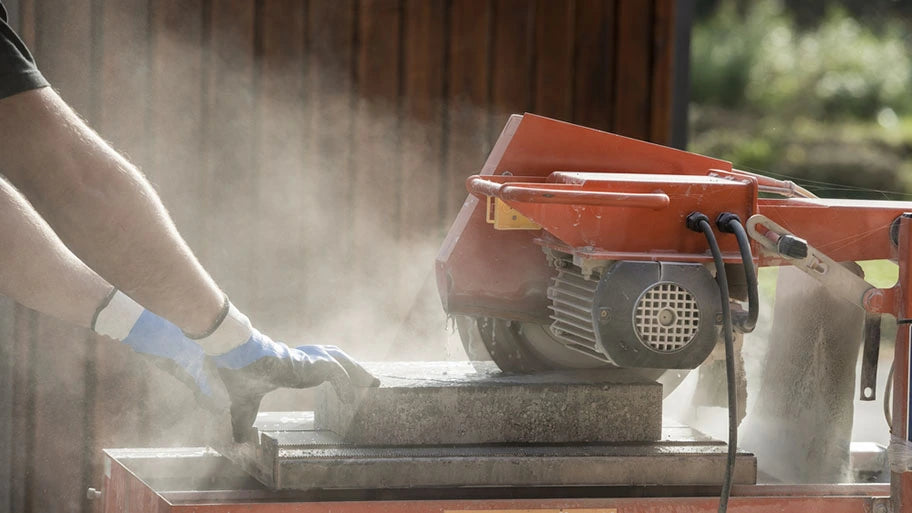
- Masonry brick saw: A masonry brick saw is typically smaller and explicitly intended for cutting standard bricks and small concrete blocks.
- Masonry block saw: Masonry block saws are larger (approximately the same size as a wet tile saw) but are more versatile. You can cut any type of construction block with a block saw.
- Table saw: A table saw (also called mini saw) is a small masonry saw intended to fit on a tabletop. Typically, mini saws can only perform dry cuts, but some models are compatible with wet cutting kits.
Shop All Our Quality Tiling and Masonry Tools
How to Use a Masonry Saw
Overall, the process is similar to a wet tile saw: Use the correct protective equipment, draw a guiding line on your brick or construction block, insert the brick or block into the tray, turn the saw on, and guide the saw slowly into the brick.
The primary difference between a tile saw and a masonry saw is related to the construction block’s dimensions. Although masonry saws can perform much deeper cuts, your block may be too large for the saw to cut cleanly on the first pass, indicating an insufficient cutting depth. If this occurs, you may need to flip the brick or block upside down, draw a new guiding line, and make a second pass until the cut is complete. Make sure to measure and mark your guiding line as accurately as possible to avoid uneven cuts.

3. Cut Off Saw
A cut off saw (also known as a chop saw or a power cutter) is a lightweight, handheld saw capable of cutting through various materials. Cut off saws may be corded or cordless, and cordless models may operate with gas or electric engines. Although they are similar in appearance to miter saws, their purposes are very different. Miter saws are for precision cutting into wood, while cut off saws are more powerful, letting you perform straight cuts into all kinds of stone and metal surfaces.
Cut off saws use an operating principle that is essentially the inverse of a tile or masonry saw. Instead of guiding a tile toward the rotating saw blade, the operator must apply the cut off saw’s rotating blade into the media to perform the cut.
Cut off saws use sawblades varying in size from 8" to 18", with the most common sizes being 9", 14", and 16". All cut off saws are suitable for dry cutting. Some models feature an integrated water pump and reservoir for wet cutting, while others offer a wet cutting kit you can install separately. Due to their handheld nature, most cut off saws come with safety devices, such as a blade guard or an overload indicator warning the operator if they’re applying too much force.

How to Use a Cut Off Saw
Cut off saws are versatile, letting you cut materials of all types without needing to bring them down to a fixed tool. However, they are also prone to heavy projections of sparks, dust, and other particulates. It is critical to wear appropriate protective gear before using a cut off saw. Before starting, gather the following personal protective equipment:
- Head protection: Safety helmet
- Eye protection: Standard plastic safety glasses
- Hearing protection: Earplugs or construction-grade ear muffs
- Protective gloves: Cut-resistant protective gloves
- Protective boots: Steel-toe safety boots with high-grip soles
- Airway protection: High-grade dust respirator (N100, FFP3, or equivalent rating)
Masonry Saws Online
Once geared up, follow these steps to begin using your cut off saw and perform a standard vertical cut:
- Visually inspect the saw and ensure it features no cracks, deformities, or other signs of damage. Inspect every control, including the switches, buttons, and pull cord, ensuring they function correctly.
- Use a saw blade appropriate for the medium you intend to cut. Inspect the saw blade for damage or signs of excessive wear before use, and replace it if necessary.
- Ensure the material you intend to cut is fixed to the floor or the wall securely. It must not shake, wobble, or show any signs of instability.
- Place the saw on the ground, and follow the start-up procedure according to the user manual for your model and power system. For wet cutting jobs, set up the water pump before continuing.
- Use a pencil or chalk to mark a guiding line on the surface to cut.
- Lower the rotating blade onto the surface and press it down to begin cutting. Work your way progressively using even, front-to-back motions. Apply increasing downward pressure until the cut is complete. Avoid twisting or jerking the saw, as it may pinch and jam the blade.
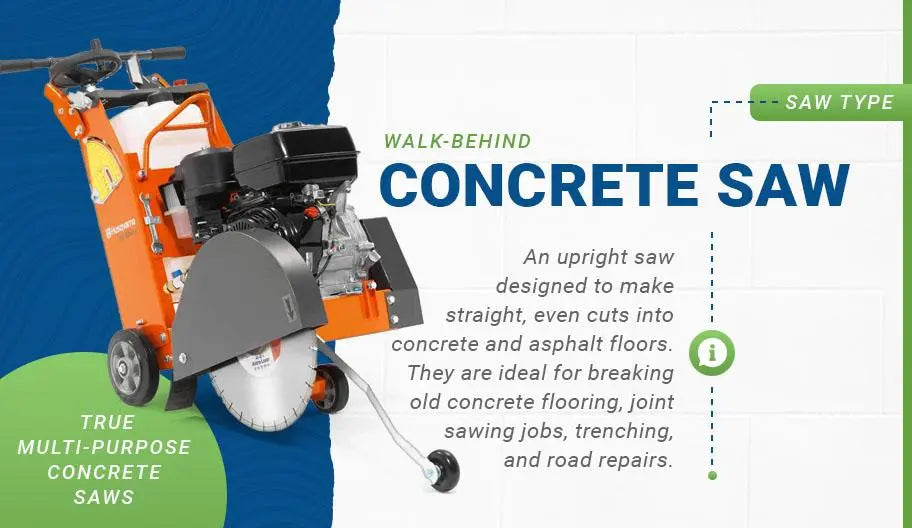
4. Walk-Behind Concrete Saw
A walk-behind concrete saw (also called floor saw) is an upright saw designed to make straight, even cuts into concrete and asphalt floors. They are ideal for breaking old concrete flooring, joint sawing jobs, trenching, utility installations, and road repairs.
Walk-behind saws typically feature 18" or 20" blades, although specific models designed for cutting green concrete usually feature smaller blades (6" to 14"). All walk-behind saws are for wet cutting only, as they typically do not come with other dust control systems like a built-in vacuum. Walk-behind concrete saws can use gasoline or electric engines. These engines typically have a higher displacement than other types of saws, making them more powerful and capable of driving sawblades at higher speeds.
How to Use a Walk-Behind Concrete Saw
Walk-behind concrete saws are safe and easy to use. You can operate one safely with minimal protective equipment: safety goggles and protective gloves are all you need. Follow these steps to set up and use a walk-behind concrete saw:
- Install an appropriate sawblade following the manufacturer’s recommended procedure (may vary between models).
- Ensure the blade is not touching the floor before turning on the saw, as it may cause the blade to jam. If needed, use the depth controls (either a mechanical wheel or an electrically adjusted lever) to raise the blade.
- Connect the saw to a water source using a garden hose.
- Turn on the engine according to the procedure in your instruction manual. Gasoline and electric models have different startup procedures.
- Once the saw is on, verify that the water supply works correctly and delivers water to the blade. If it does, you may proceed. Otherwise, turn the saw off and inspect the pump and delivery system for blockages.
- Use the depth controls to lower the blade slowly into the surface until it audibly touches the floor. Then, carefully adjust the depth controls again until it reaches the desired cutting depth.
- Start pushing the saw slowly, allowing it to cut a line into your surface until it reaches the desired length.
- Do not cut directly to the saw’s maximum depth in one pass. Instead, use the step cutting method: Make a first pass at a shallow depth, then a repeat pass at the desired depth. Step cutting prevents your blade from wearing out prematurely.
Shop Top-Quality Saws at Contractors Direct
At Contractors Direct, we carry a comprehensive selection of saws of all types for cutting and reshaping nearly any material. Browse our selection and find everything you need to cut tile, bricks, concrete blocks, asphalt flooring, and more.
Image Credits
Blan-k/Shutterstock.com
Tegar Rynaldi/Shutterstock.com
KAWEESTUDIO/Shutterstock.com
Viacheslav Lopatin/Shutterstock.com
Gajus/Shutterstock.com
Dmitry Kalinovsky/Shutterstock.com

